Can You Change the Shopify "News" Blog to Something Else?

There are many different platforms you can use to run a blog. I always recommend WordPress because the power, flexibility, and customization available make it an incredible platform. However, there are many reasons why you might want to use a different CMS. For example, many people build blogs as something secondary, as a marketing technique, when their primary efforts go towards a storefront. Shopify is a natural fit for that situation; the store-first design and powerful e-commerce features make it an easy choice for the store portion, and their integrated blog is good enough to do the job, at least while the business gets established.
There's one possible issue that crops up a lot with the Shopify blogging system, and it has to do with the way they make their blogs. Shopify essentially makes two assumptions:
- That you don't particularly care too much about the URL slug for your site, and
- You might want to run more than one blog on your site.
The default is a news blog, which presents two issues. Fortunately, there are a few solutions, so let's go through the problem and the options you have available.
 30 Second Summary
You can use WordPress or Shopify for your blog, but Shopify has URL limitations you need to know about. When you use Shopify, your blog URLs will always include "/blogs/news/" and you can't change this format. You have three choices: accept the URL structure as-is, split your content into multiple themed blogs (like news, guides, tips) or set up a separate WordPress blog on a subdomain. You'll get the most flexibility with WordPress, but keeping Shopify works fine if the URL format doesn't bother you.
The Shopify News Blog Problem
The problem is that Shopify's system is hard-coded to assume that you have more than one blog, even if you don't care to use more than one, and that your default is a news blog.
There are two issues here that some people may want to address.
The first is that the default blog is named News. If you don't want it to be a blog focused on company news, or industry news, or anything of the sort – or even if you just want better branding for it – you might want to change the name. This, fortunately, is easy, and I'll tell you how to do it in the first of the solutions below.
The second problem is trickier and relates to the URL.
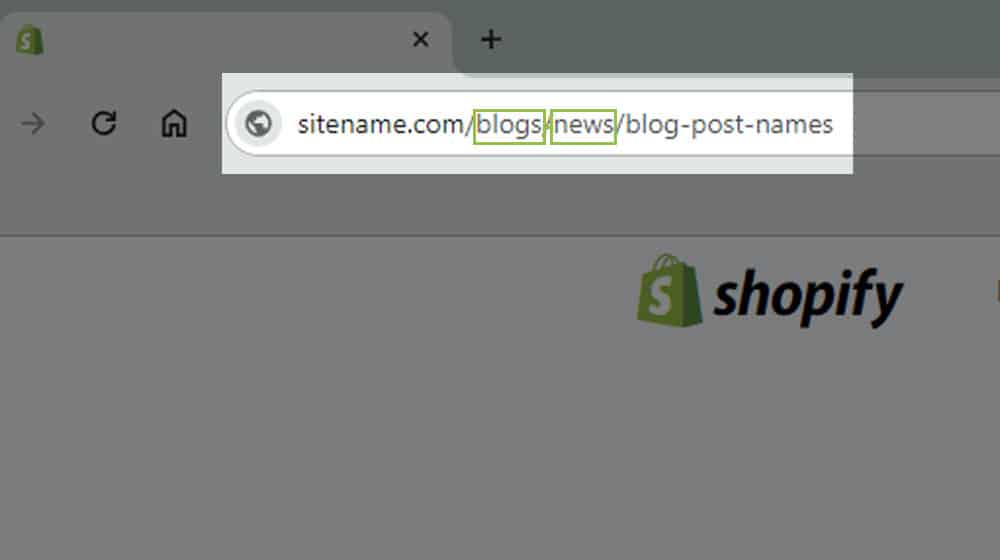
Since Shopify assumes – and is set up so that – you will have more than one blog, the URL slug, by default, has blogs in the string. So, your Shopify site has:
- Sitename.com/products/product-category/product-name
- Sitename.com/blogs/news/blog-post-name
- Sitename.com/blogs/other-blog-name/blog-post-name
So, what happens if you only want or use one blog? If you don't change the base URL, you are always stuck with sitename.com/blogs/news/blog-post-names as your URL string. Having both blogs/news is redundant and messy, and the plural nature of "blogs" implies that you have more than one; if you don't, it's just wrong.
There are a couple of options you have here, but unfortunately, they may not be satisfying. I'll go through those once we address the easier issue of the display name.
Renaming the Shopify News Blog
For the first issue, with the display name of the blog being "News," you can change this easily.
- Sign into your Shopify account.
- Click on Online Stores in the left-hand sidebar.
- Click on Blog Posts.
- Click on Manage Blogs in the upper right corner.
Here you have the "Blog Details" section with a Title box. This can be changed to say whatever you want it to say, like the branded name of your blog.
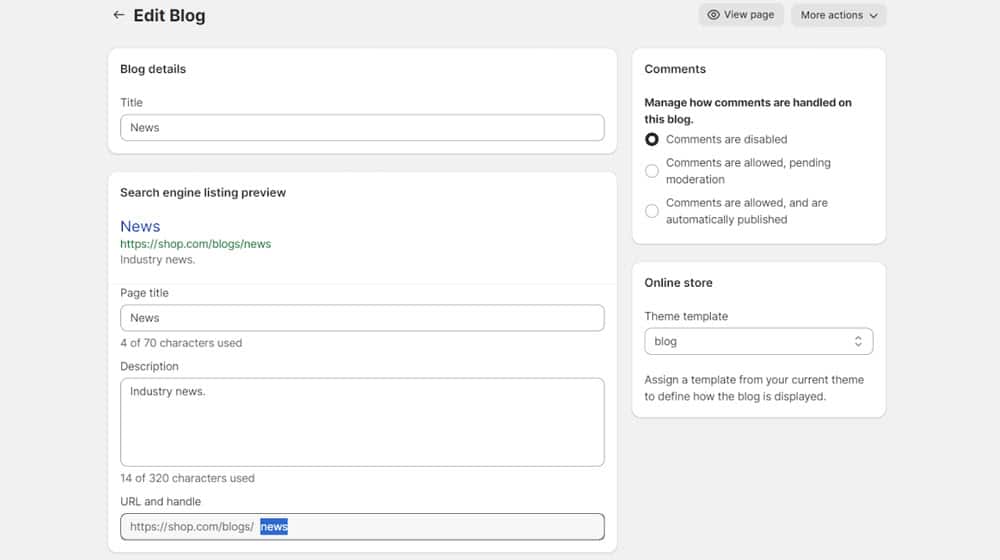
However, this only changes the blog's on-page display name. Your URL will still say News unless you change that as well. To do that, from the same window:
- Click on Edit Website SEO.
- Change the Page Title to match your Blog Title (this is your meta display title.)
- Under URL & Handle, change the URL slug to fit your new choice.
Note that you will still run into the second of the described problems, so if you want to solve that issue, you'll have some more work to do.
Options for Changing the URL of a Shopify News Blog
If you want your blog to be something like:
- Sitename.com/blog/post-name
- Sitename.com/digest/post-name
- Sitename.com/blog-post-name
I have bad news for you: you're almost out of luck.
By default, there's no way to change the word "blogs" in your URL string with Shopify. This has been something people have been asking about for at least six years, but Shopify has not implemented the feature and seems to have no interest in doing so.
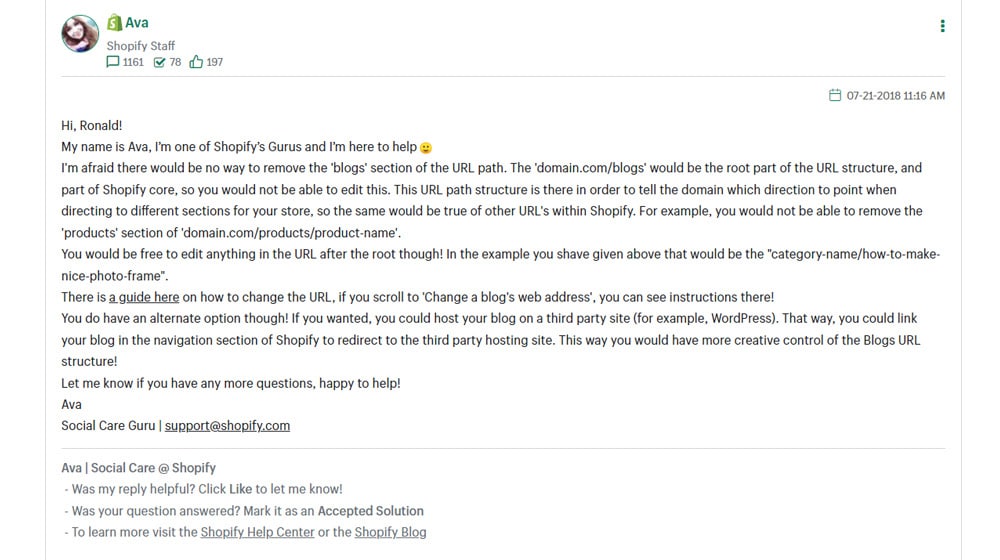
You can feel free to – and I encourage you to – post in the Shopify discussion boards to request the feature and add your name to the list of people who want it. Unfortunately, it doesn't seem to be a high priority, so I wouldn't get my hopes up.
So, with that in mind, I have three possible solutions for you.
Option 1: Deal With It
I know it's not really a solution, but I ask you to ask yourself a question: is it worth worrying about?
Yes, having /blogs/ seems inaccurate if you only have one blog. Yes, having something like /blogs/blog/post-name is messy and sucks. But you don't have to name your blog /blog/; you can name it something else. Maybe blogs/insights/ or blogs/strategies/ or blogs/information/ or something else. Even a branded name for your blog can go well in part of the URL string.
A lot of people complain about the SEO implications of this. And yes, there are some.
Google prefers shorter URL strings, and they prefer descriptive, accurate URL strings. But is Google really penalizing every Shopify blog for this? Probably not. The URL string is important, but it's not going to be the difference between ranking #1 and not ranking at all. Let's be honest here: it's a relatively minimal aspect of SEO, all things considered.
The way I see it, there are a million different details you can spend your time and effort on instead of agonizing over the URL string.
You can spend a bit more time making better content. You can invest a bit more into off-site link building. You can go through and do a complete content audit and invest in some careful content pruning. You can optimize your metadata, put some effort into image alt text, buff up your internal linking, and spice up your calls to action.
Frankly, changing your URL string any time after the initial work of setting up your blog can even do more harm than good since Google needs to rediscover and reindex all of that content, and you would likely need to set up proper redirects.
Option 2: Use Multiple Blogs
Your second option is to consider using Shopify the way they intend it to be used.
Why not just use more than one blog?
Truthfully, many sites should do this more than they actually do. Consider treating the different blogs more like categories.
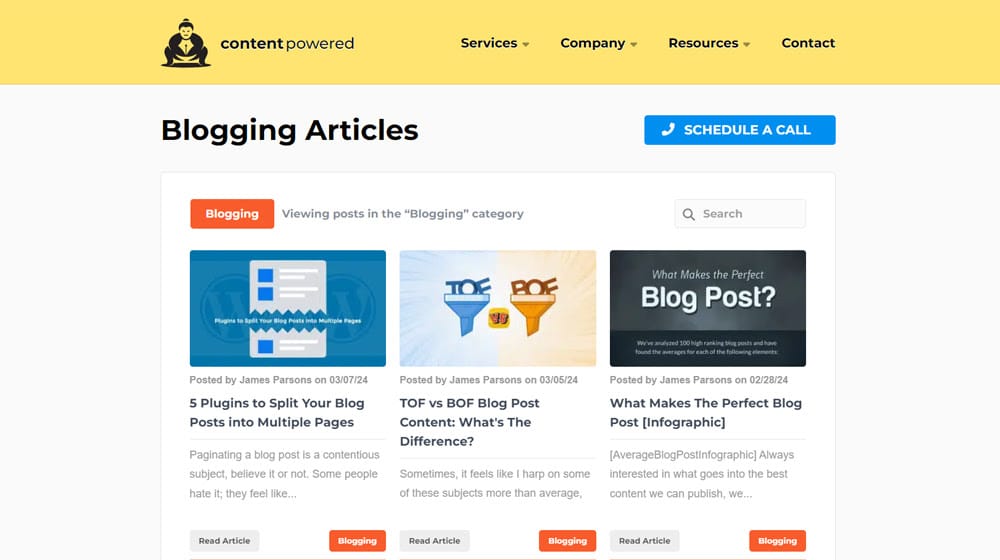
For example, here on ContentPowered, I have categories like:
- https://www.contentpowered.com/blog/category/blogging/
- https://www.contentpowered.com/blog/category/marketing/
- https://www.contentpowered.com/blog/category/ppc/
You can set up something similar on Shopify. You can even keep the default News blog and use it for company news. So you might have:
- Sitename.com/blogs/news/
- Sitename.com/blogs/marketing/
- Sitename.com/blogs/PPC/
And so on. Of course, I write about marketing topics, so my main categories are marketing-related. You would want to pick categories that are more relevant to your site. Maybe:
- Sitename.com/blogs/news/
- Sitename.com/blogs/beauty/
- Sitename.com/blogs/fitness/
You have a lot of options here. Honestly, this might be your best option if you're using Shopify and insist on keeping it as your blogging platform of choice. I have other advice – you can read the next section for more – but Shopify isn't the worst CMS out there, not by a long shot.
Option 3: Use WordPress
Now, I don't mean switching your entire business to WordPress. You can certainly do that if you want; plugins and systems like WooCommerce are perfectly functional storefronts that honestly give you more control than just using Shopify. But I can definitely understand the hesitation to make such a major migration. It's a huge headache! You interrupt service, you have to make sure you don't lose orders or data in the process, you need to export and import all of your data successfully and make sure it all indexes properly… it's a lot.
So, instead, why not use WordPress for your blogging needs and keep using Shopify as your primary site? It can be a bit of a hassle, but you can do it.
First, you need to add a subdomain to your Shopify store. Fortunately, Shopify allows you to do this fairly easily.
- Log into your Shopify account.
- Click on Settings.
- Click on Domains.
- Click on your root domain.
- Click on the Subdomains section and add a subdomain.
- Add your chosen subdomain, probably "blog," for the simplest option.
- Save your subdomain.
Shopify will do the rest of the work. Do note that these steps only work if Shopify is the registrar for your domain. If it isn't, you'll need to go through your domain registrar, edit your DNS information there, and connect it back to Shopify.
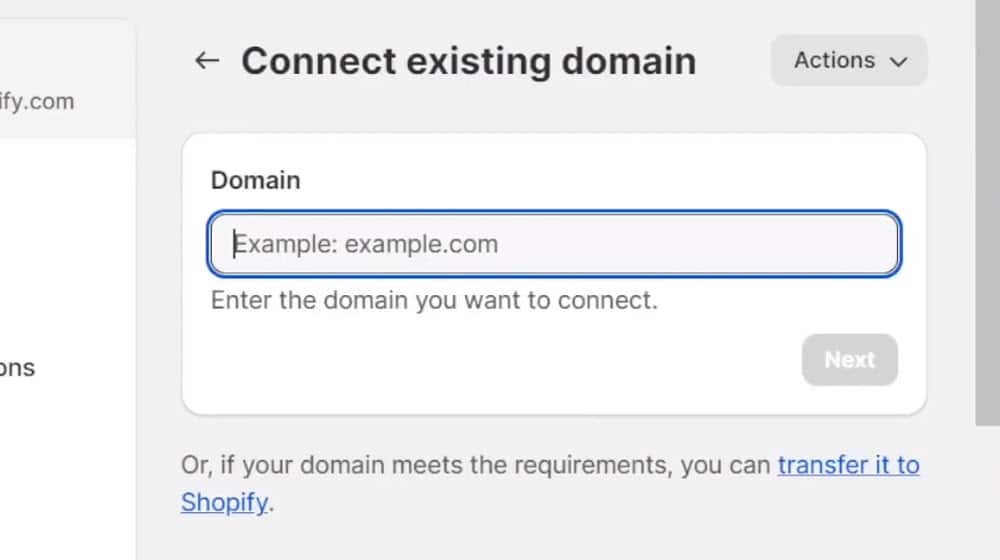
This gives you blog.sitename.com as a valid URL, but for now, it doesn't actually point at anything.
Next up, you need to set up web hosting with your WordPress installation. You can buy web hosting from any of a thousand different providers, and don't need to worry about buying a domain from them, as you already have one.
Fortunately, WordPress is easy to install, and can be done natively from most web hosting dashboards, since it's so popular it's integrated with most hosts. You'll want to find a WordPress template and theme that comes as close in design to your Shopify store as you can, and customize it to match. Install any blog management plugins you want to use as well.
You can take the time now to copy all of your blog posts over, keeping the URL strings as close as you can. Your goal is to have WordPress on a subdomain, so you'll have sitename.com/products for your store and blog.sitename.com as your blog. So, all of your WordPress posts will be blog.sitename.com/category/post-name format. You don't even need the /category/ if you don't want it, though I prefer it for organizational purposes.
For now, don't worry that you're duplicating content. The WordPress site shouldn't be indexable yet regardless.
If the process of migrating posts is long and tedious, there are some services and tools that can help, but you'll need to investigate them yourself. I don't have a recommendation at the moment. If you do, feel free to let me know!
At this point, you have a Shopify site with a blog at the /blogs/ url and a WordPress site with whatever default domain name your host set it up with. Now we need to join them up properly.
Your next step is to change the DNS records so that your subdomain points to the IP address for your WordPress blog. You can find instructions on how to add a DNS record for a Shopify-managed domain here.
Once this is done, you're in the Duplicate Content Danger Zone; every blog post on your Shopify site is available at sitename.com/blogs/blogname/post-names, and all of your WordPress versions are available at blog.sitename.com/post-names. So, your last step is to fix this.
The fix is redirects. Fortunately, this is also something Shopify allows you to manage easily.
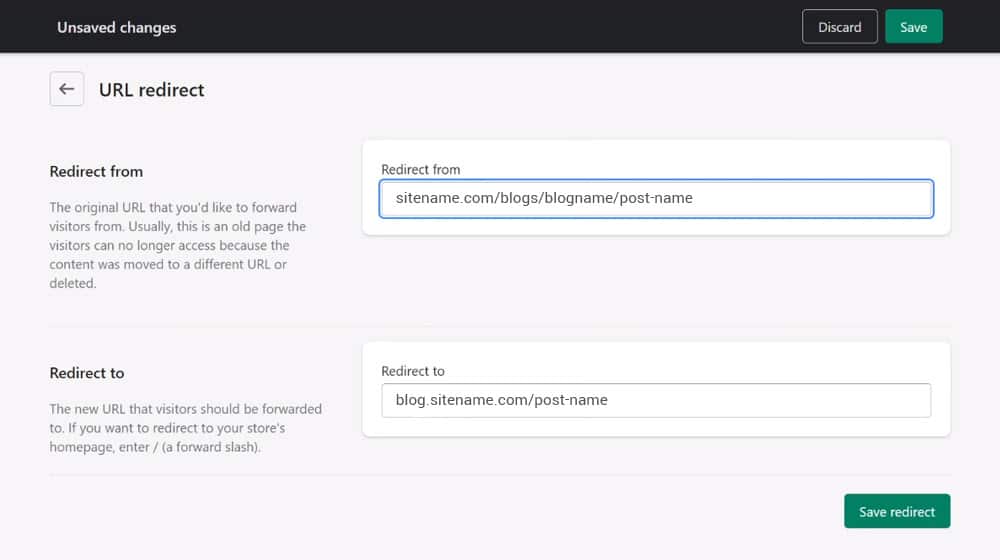
It's just not where you might expect it to be.
- Log into your Shopify site.
- Click on Settings.
- Click on Apps and sales channels.
- Click Online Store.
- Click Open Sales Channel.
- Click Navigation.
- Click URL Redirects.
- Click Create URL Redirect.
In Redirect From, enter the URL of the sitename.com/blogs/blogname/post-name you're redirecting.
In Redirect To, enter the URL of the blog.sitename.com/post-name you're pointing it to.
Now, this is a tedious process, especially if you have hundreds of blog posts on your site. Fortunately, you can bulk import redirects from a CSV in Shopify. It just needs to be formatted like this:
Redirect from,Redirect to
/example_product.php,/products/example-product
One critical note here: you need to go back and delete the blog posts on the Shopify site once the redirects are in place. As Shopify says in their URL redirect page:
"Only broken URLs should be redirected. Broken URLs might load a "page not found" placeholder message, or "404" might display somewhere on the page or in the page title. If the URL still loads a valid webpage, then the URL redirect won't work."
For the redirect to work, the page that was at the URL needs to not exist. Fortunately, this is pretty easy to test with an underperforming blog post that, if it ends up deleted, won't be a huge problem or can be restored easily.
Once all of this is done, all you need to do is maintain your WordPress site and use it as your blog. It's a great option, trust me! It's just a lot more work than the other two options.
What do you think? Are you ready to migrate?


 30 Second Summary



Comments