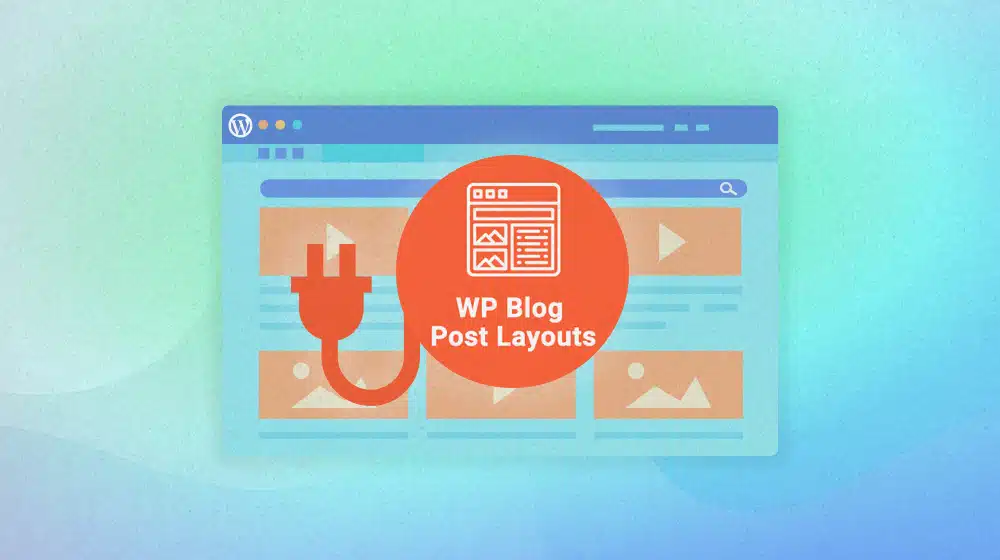
How Do You Use the WP Blog Post Layouts Plugin?
Written by 
WordPress is extremely powerful, but only because there are thousands of talented developers out there making extremely powerful plugins for it. Some of those plugins are immensely popular, with the top ten all having over a million active installations. Others are a lot smaller and more niche or are still growing.
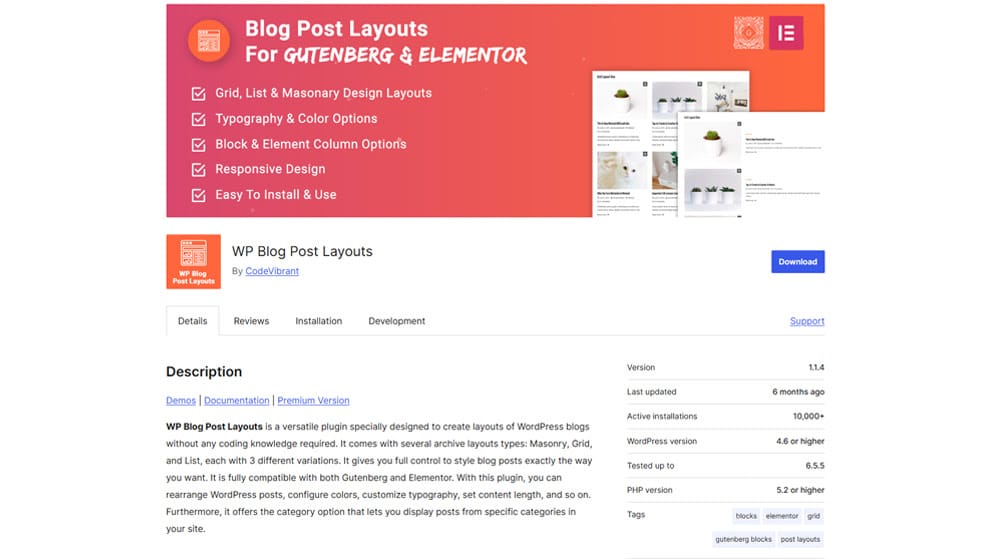
One of those smaller plugins – but one I've found extremely interesting – is called WP Blog Post Layouts. It currently has 10,000+ installations and a 4.7 out of 5 stars rating on WordPress's plugin directory. It's freemium, with a paid plan and a free version. I think it's worth giving a look, so read on to learn what it does and why I think you should give it a try.
 30 Second Summary
 30 Second Summary
You can use WP Blog Post Layouts to change how your blog archive looks and works. You'll get three main layout options: grid, list and masonry. With the free version, you can fully customize colors, fonts, post order and what content shows up. You don't need to code anything - just use the block editor to set it up. While the premium version costs $40, you can stick with the free version since it has all the core features you need. The main drawback is that you'll need to create a blog post to use as your archive page.
All About WP Blog Post Layouts
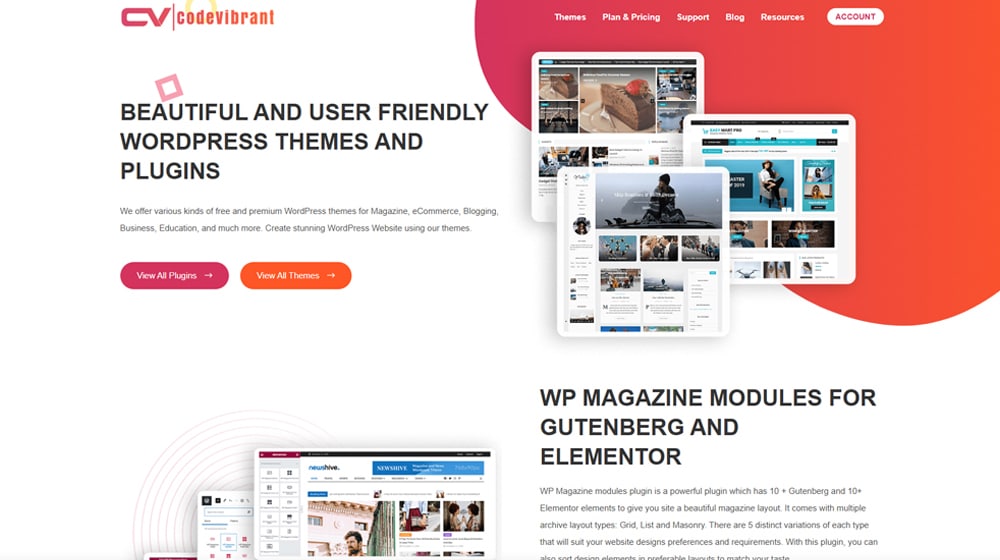
WP Blog Post Layouts is developed by CodeVibrant, a company that makes a roster of broadly compatible themes and plugins for WordPress, designed to work with both the Gutenberg editor and Elementor. They've mostly made themes to date but have two plugins: one that adds magazine-style modules to WordPress and the one we're talking about today, WP Blog Post Layouts.
As mentioned, the plugin is freemium. There's a free version available on the WordPress plugin directory, and you can buy the premium version from CodeVibrant.
Before you rush to click install or buy, let's talk about what the plugin actually does.
The description from CodeVibrant is this:
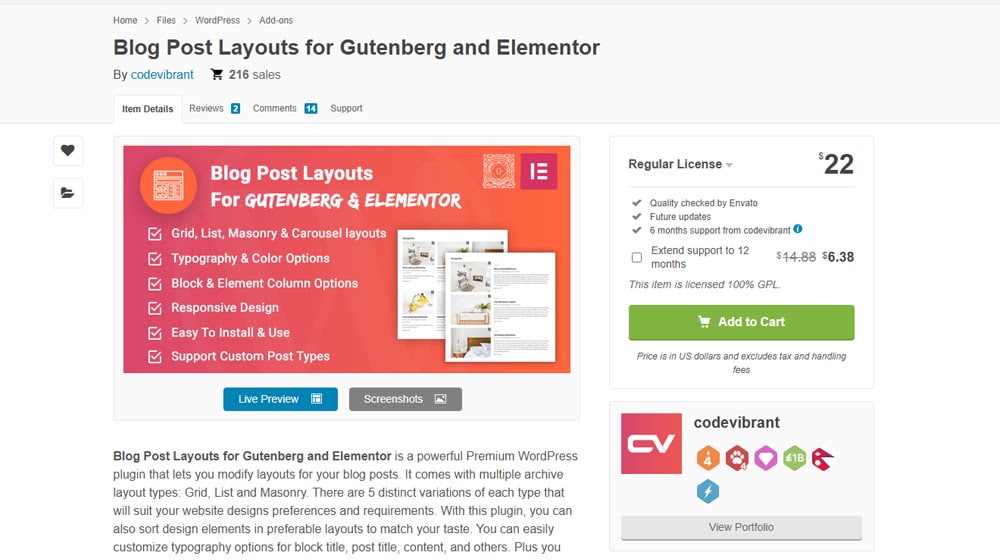
Blog Post Layouts for Gutenberg and Elementor is a powerful Premium WordPress plugin that lets you modify layouts for your blog posts. It comes with multiple archive layout types: Grid, List and Masonry. There are 8 distinct variations of each type that will suit your website designs preferences and requirements."
Of course, that doesn't actually tell you what the plugin does, so let's dig in.
A quick summary is this: WP Blog Post Layouts gives you a bunch of options for how your blog posts display in your archive. It has three main display types, each of which has three variations. Yes, that totals nine, and their website description says eight, but I think they just didn't update the number when they added one.
Normally, when you run a WordPress blog, your archive is just chronological. It's just a list of the posts you've published in order from most recent to oldest. Users can navigate by categories or tags, click on author names, or browse the archive in other ways, like with a search, but the basic display is a core sort by WordPress itself.
WP Blog Post Layouts lets you change this. You can change the order of posts, make it display certain categories of posts instead of all posts, rearrange them, set colors, change typography, and do a bunch of other configurations. It's all fully compatible with the basic WordPress editor and with Elementor, but not with things like the Classic Editor that remove block functionality.
The plugin adds three post blocks to your block editor, one for each of the three types of layout. So, you get a Grid Post Layout block, a List Post Layout block, and a Masonry Post Layout block.
Since it's a block editor feature, you don't need to do any coding or finicky setting management to use WP Blog Post Layouts. Install it, configure it, make it look good, and you're good to go.
Under the hood, the plugin basically has you create a blog post using blocks that represent your blog post archive and then uses that as your blog archive instead of the default archive. It's a fairly simple but well-implemented way to manage your blog archive with a lot more customization than you usually get.
What Does the Paid Version of the Plugin Offer?
One of the biggest questions most of us have when we see a freemium plugin is what features are being gatekept behind the paywall. Some plugins are entirely usable for free; others are barely functional and put more ads than features in your admin control panel. So, where does WP Blog Post Layouts fall?
Fortunately, it's more of the former. In fact, it's so much so that it's kind of a bad thing.
What do you get when you pay for the plugin?
First up, it's a one-year license. So, you get the premium plugin, and you get updates for one year after your purchase date. That's pretty standard for premium plugins; you don't lose access to the premium features, but when updates are pushed out, you don't get them unless you renew your license.
Secondly, you get premium support. CodeVibrant is a company made up of people in Australia and, oddly, Nepal, so keep that in mind if you need the support, but you do get access to it.
You also get a set of premium "starter demos" for the plugin. These are just examples of the layouts you can configure and can be used as a jumping-off point to customize for your own layouts. They aren't new features; they are just examples of how you can use the features already present in the plugin.
Other than that, you get access to their documentation. They say "extensive documentation," but truthfully, I'm not sure what that entails. They already have documentation available, both on their site and on their GitHub, though from the looks of things, no one has touched the GitHub in four years.
What about features? As far as I can tell, there aren't any. The free version of the plugin is all the plugin has to offer.
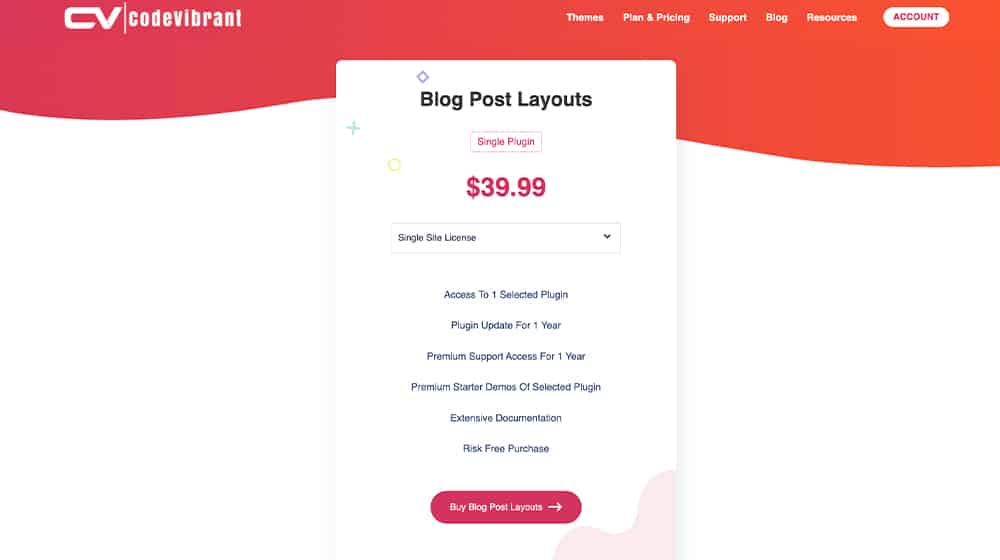
How much is the premium plugin? $40 for a single-site license, $60 for a three-site license, $80 for a 10-site license, and $120 for an unlimited license. If you're a web design agency and want to use it on all your client sites, that's not a bad value.
Interestingly, if you buy it through CodeCanyon, it's $22 for six months; it's slightly more expensive, but you can extend support to 12 months for an added $6, making it cheaper.
How to Make Use of WP Blog Post Layouts Effectively
If you've decided to make use of the plugin, how can you do it? Fortunately, it's pretty easy.
With any freemium plugin, you have to decide if you want to buy the premium version or stick with the free version.
My thoughts? Probably stick with the free version. You don't really need documentation since it's all pretty self-explanatory, and you can always just ask me questions or read through the freely available documentation if you have questions about using it. Any questions about compatibility or feature requests don't go through the premium gateways anyway, so you really aren't getting much value out of the premium purchase.
Plus, if you install the free version, you get free updates as they're pushed, so you're still getting updates. It's not like the plugin is four years out of date or anything like that. I will say, though, that it doesn't seem to be in super-active development. They push the occasional bug fix, but they haven't added major features in a long time.
If you use the free version and don't like their in-admin calls to action, or you just want to support the developers, you're free to purchase premium. Right off the bat, though? I wouldn't bother.
Step 2: Install the Plugin
The first thing to do is install the plugin.
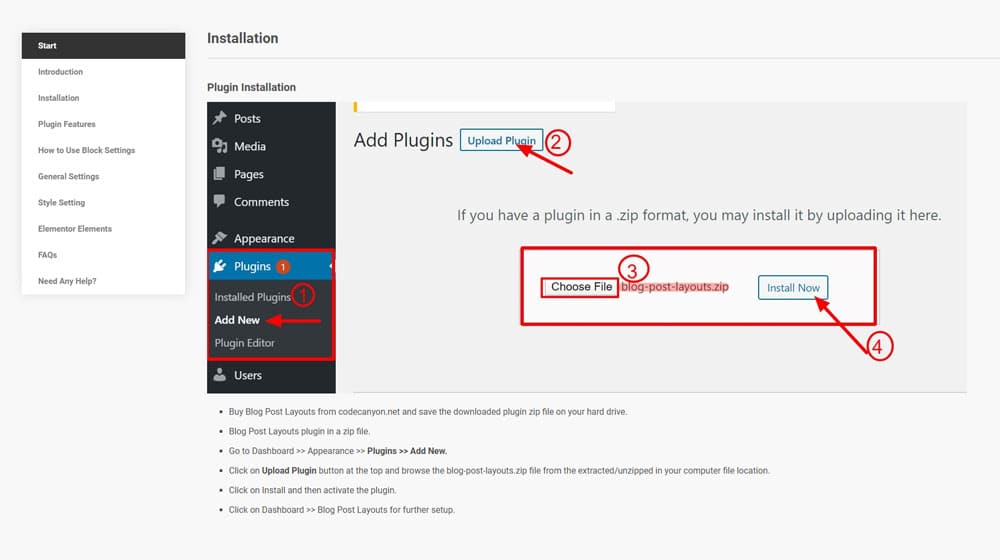
It's easy enough to do; you can install it from the WordPress plugins page, download the zip file, and upload it to your site to install, use the built-in search in your admin dashboard, or (if you buy the premium version) upload that one. Installation is trivial; there's no authentication or API key or any other nonsense needed.
Step 3: Pick a Core Layout
Once your plugin is installed, you will want to pick which of the three core design layouts you want to use. They are the grid layout, the block list layout, and the masonry layout.
- The grid layout is a simple grid of columns, where each row has the same height, so they're even when you scroll down.
- The block list layout is a standard single-column list of posts.
- The masonry layout is a grid layout with dynamic height in each column, so the posts layer more like offset bricks rather than lining up in neat rows.
You can see all three of these in action in the demos section of CodeVibrant. They show you eight variations for grid and list and one option for masonry. You can also see demos of the three variations you can use if you're Elementor-based.
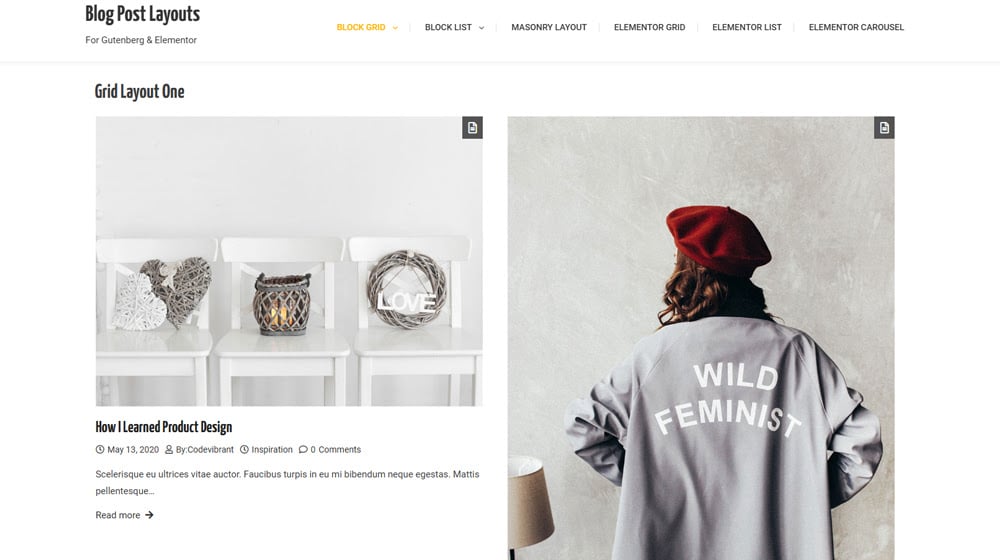
Don't use their design elements to make your decision; just look at the layouts themselves. You can customize just about everything you want aside from the core layout later.
Step 4: Create and Customize Your Design
Once you've picked a layout, it's time to go through all of the elements and customize how you want them to look.
Start by creating a new template from your blog post layout dashboard. Add the block for your chosen layout, and save the template.

In terms of general settings, there's not a ton to do.
- Add a title for the main block if you want a display title.
- Choose the types of posts and the category you want that block to display.
- Choose how many posts will load in that block.
- Choose whether or not you want to show content from the post, and if so, how much of that content (this is your post excerpt, basically.)
- Choose the label for the "read more" button.
Then, you can choose some more settings you want to specify under the Query Settings box.
- Choose how your posts are ordered, such as by date, author, or category.
- Choose if you're displaying the date, the author, or the category for the posts.
- Choose if you want tags for the post to be displayed, and if so, how many.
- Choose whether or not you want the number of comments to be displayed.
After this, you can set a fallback image. It's your featured image, basically, but it works if the default image doesn't load. Just pick a generic logo or something; there's a pretty good chance no one will ever see it outside of people with internet issues or when your site is otherwise broken.
Under advanced settings, you can do a lot of layout tweaks. These include picking how many columns you want to display, whether or not there are margins, whether or not you display the post format, if the metadata displays, and more. You can also rearrange elements like the content, title, metadata, and thumbnail to customize the appearance of each post entry.
Typography settings are also available. Choose the font, weight, size, style, transform, color, border, and more for each text element. It's a fairly robust list of possible settings, and you can pick from Google fonts. Optionally, you can also tweak the CSS directly.
Once you have everything set up the way you want it, you can save the template and use it as your archive page.
Do You Need WP Blog Post Layouts?
Need? No, of course not. Want? Maybe. If you've always lamented the lack of customization for your archive page, being able to design your own without having to do a bunch of finicky code is a great feature.
There are a few downsides to this plugin, though. For one thing, I say, "Use it as your archive page," but what that really means is publishing a blog post with the layouts template as a post and redirecting your blog archive URL to that post rather than your normal archive. It's a kind of hacky workaround to the fact that the plugin relies on a block rather than editing the archive page itself.
Secondly, it's not all that broadly compatible. For example, while it works fine with a basic WordPress site and with Elementor, it doesn't work with WooCommerce, and I have to assume it doesn't work with alternate frameworks like Genesis.
Overall, if your site is relatively simple and you just want more control over your archive displays without tediously editing CSS, go for it. If you're fine with manual edits and you're comfortable with CSS, you probably don't need it. Either way, if you have any questions, let me know!
Hi, I'm James Parsons! I founded Content Powered, a content marketing agency where I partner with businesses to help them grow through strategic content. With nearly twenty years of SEO and content marketing experience, I've had the joy of helping companies connect with their audiences in meaningful ways. I started my journey by building and growing several successful eCommerce companies solely through content marketing, and I love to share what I've learned along the way. You'll find my thoughts and insights in publications like Search Engine Watch, Search Engine Journal, Forbes, Entrepreneur, and Inc, among others. I've been fortunate to work with wonderful clients ranging from growing businesses to Fortune 500 companies like eBay and Expedia, and helping them shape their content strategies. My focus is on creating optimized content that resonates and converts. I'd love to connect – the best way to contact me is by scheduling a call or by email.
Comments