Link Whisperer Guide: Use ChatGPT to Find Internal Links
Blogging isn't just about writing about a topic that's interesting to you and putting it online. There are a million little tasks you need to accomplish along the way. There's keyword research, keyword usage, formatting, structure, meta titles, meta descriptions, images, image alt text and descriptions… the list goes on and on and on.
One of those tasks – and one that people frequently overlook – is internal linking. Internal linking can be incredibly valuable and important for blogging, but it's also a task that doesn't feel very impactful, so it's easy to let it slip through the cracks. I have even had times when I wrap up a post, and I'm ready to hit publish, but then I realize I missed a couple of helpful internal links.
Fortunately, there are ways to help streamline and improve the process, so let's talk about it.
The Importance of Internal Linking
Internal links are important for a variety of reasons.
The simplest reason is navigation. All of those links in your header, your sidebar, and your footer are internal links. We tend to think of them less in terms of blogging and more in terms of site infrastructure and UI/UX, and that's fine. They help users get around your site if they want to navigate your structure.
Internal links within your content are similar but different. They're similar in that they help visitors get around your site, but they're different because they're contextual and relevant to the topic at hand.
For example, I have another post on this blog answering the question, "How many internal links should you have in your blog posts?" If that's a question you have – and you probably do have it – you might be interested in seeing that post.
Can you find it? Maybe it shows up in my related posts box, but maybe it doesn't. You can go to my blog index and search for it with the search box, but if you didn't know that I had published that post, you might not think to search for it.
An internal link, meanwhile, takes you right to it.
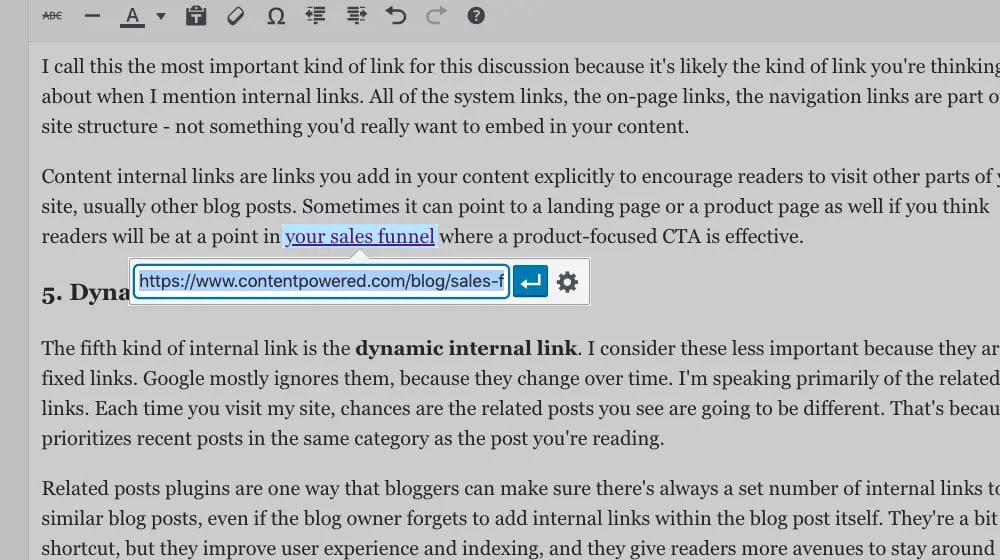
Internal links help show your visitors that you have additional, related content that they can read if it interests them. It's also a way to build some authority and trust! When you write extensively on a given topic, you're more likely to have a good knowledge base and reliable opinions. That's opposed to someone who only has one post on a topic; they might just be dabbling in it or barely including detail in a surface-level analysis.
Internal links are an SEO factor. Web crawlers like Google need to find pages to be able to index them. If you have a good sitemap, they can just use that, but they do like to see that your content has links pointing to it. Plus, users aren't going to be looking at your sitemap, and Google's #1 rule is to create your site for users, not for the robots.
So, it's clearly important that you include internal links in your posts, but it's also tedious and sometimes annoying. If you're anything like me, you have a fairly decent awareness of the content you've written before, but the older the content is, the more likely you are to forget about it. I've even had to run searches on my own site for keywords I mention just to refresh whether or not I've written about them before, to include as a link.
Okay, now that we know how this all works, let's talk about Link Whisperer.
What is Link Whisperer?
Link Whisperer is an app that does a lot of this tedious process for you.
Specifically, Link Whisperer is a WordPress plugin that crawls your site and indexes your pages by topic. It also indexes the links you already have, both internal and external, so you can see things like what external domains you link to the most, what internal pages have the most links pointing to them, and so on.
There are a few beneficial features of this app and one of the biggest is the ability to find orphaned posts. Every post needs links in it pointing to other posts, but the opposite is also true! Every post should have links pointing to it, and I don't just mean links in your blog index. Link Whisperer can easily identify those orphaned posts.
Technically, you can do all of this kind of analysis using a scraper tool like Screaming Frog or Greenflare, but it's trickier and less focused.
The ability to find orphaned pages is one of my favorite features, but one of the most consistently useful features I've found is link suggestions.
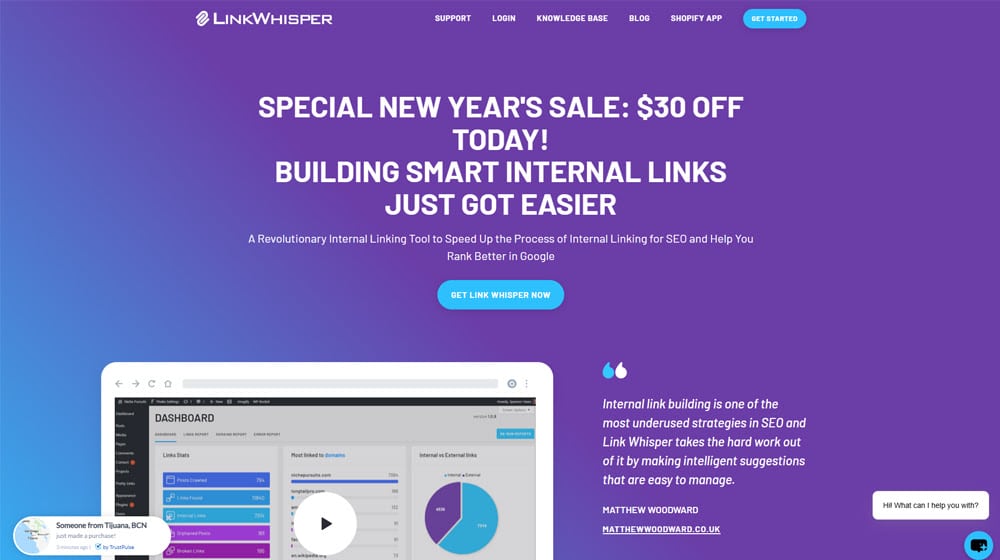
Link Whisperer indexes your entire post history based on core keywords. It's not as advanced or nuanced as Google's indexation, but it doesn't have to be. All they need is an internal database of posts with primary topics attached.
That way, when you're writing a new post, Link Whisperer can monitor what you're writing. When you use a keyword that you have another post about, it will suggest the opportunity for an internal link. You can add it with the click of a button, or change the link (to add UTM tracking or parameters, for example), or ignore the suggestion.
What's really nice is that when you first install Link Whisperer, after its initial indexation pass, you can go back through old posts and add links to round out the value and linking structure of your site. It's not fully automatic – you do still want to review what links you add to what posts – but it's a lot faster and easier than having to re-read the posts entirely and find link options on your own.
Note that they do have a fully automatic version of this, called their Auto-Linking feature. You specify a keyword and a URL, and it will go back through old posts on your site and inject the link automatically. This is very powerful, but use it with caution so you aren't putting links in inappropriate places.
It's also handy that Link Whisperer can give you a link 404 report as well. They're already crawling and indexing your links; it's trivial to report the status of the links along the way. It's just good practice for overall site health to minimize 404 links.
Link Whisperer starts at a $97 license for a single site, which lasts for a year. There's no free trial, but they do have a 30-day money-back guarantee. There are also discounts if you want more licenses for more sites (such as if I wanted to use it for my clients).
Using Link Whisperer's New ChatGPT Feature
One thing I haven't mentioned yet is Link Whisperer's AI feature.
If you know me, you know I'm cautiously skeptical but optimistic about AI in marketing. Generative AI can be god-awful, but AI-powered tools have the potential to be very useful because they can scan hundreds or thousands of posts in minutes.
After having used Link Whisperer's AI features, I'm a big fan now. It uses ChatGPT, but the way it uses it is very powerful in a way that doesn't have the potential to hurt your site if Google pulls an AI Panda update.

Link Whisperer has three AI-powered features:
- Relation Analysis. This scans all of your posts, performs GPT-powered semantic analysis on them, and generates an AI Sitemap that includes the relationships between posts. If you use the Link Whisperer Related Posts widget, this AI Sitemap makes it more accurate and focused.
- Product Detection scans your site and looks for times when you mention (but don't necessarily link to) products in your posts. For example, up above, I mentioned Screaming Frog and Greenflare; this feature would identify those mentions. You can then use this data to find more external linking or even affiliate linking opportunities.
- Keyword Analysis scans every post on your site and distills the list of target keywords it has based on the content. This might not seem useful – if you use an SEO app like MarketMuse, you already have this information – but there are two ways this feature is helpful. The first is that the target keyword you want to use and the target keyword you actually used can be different. The second is that the data this analysis derives then powers Link Whisperer's link recommendations.
Of these, it's the third feature I've gotten the most use out of.
The conceptual view of how it works is this:
- Link Whisperer sends your content to GPT for analysis.
- Each post is flagged with primary topic and keyword information.
- A further analysis looks for relationships between different posts and draws a map of relevance.
- It then compares that relevance with your link map. If two relevant posts are not linked, it gives you a link suggestion so you can add the internal links to each of them.
Since this runs a bunch of queries to OpenAI – one for each blog post, plus a few for analysis – you will need to have an OpenAI API key and be willing to pay for it. Fortunately, it's pretty cheap; when I ran it, it cost me something like 20 cents for 500 posts.
So, how do you get this up and running?
Step 1: Get Your API Key
The first thing you need to do is get the OpenAI API key so you can plug it into Link Whisperer and activate the AI features. Note that you also need to make sure Link Whisperer is updated in your plugins since the features are only available in the most recent versions.
First, go to the OpenAI Developers Platform and log in (or create an account if you don't already have one.) Go to your dashboard and add payment info.
Note: OpenAI runs on a prepaid system, so you'll need to add money to your account. I found that tossing $10 in was plenty. You can set an auto-top-up threshold if you want, but I recommend only doing this if you plan to get a lot of use out of GPT and you don't want the hassle of occasionally running out of funds.
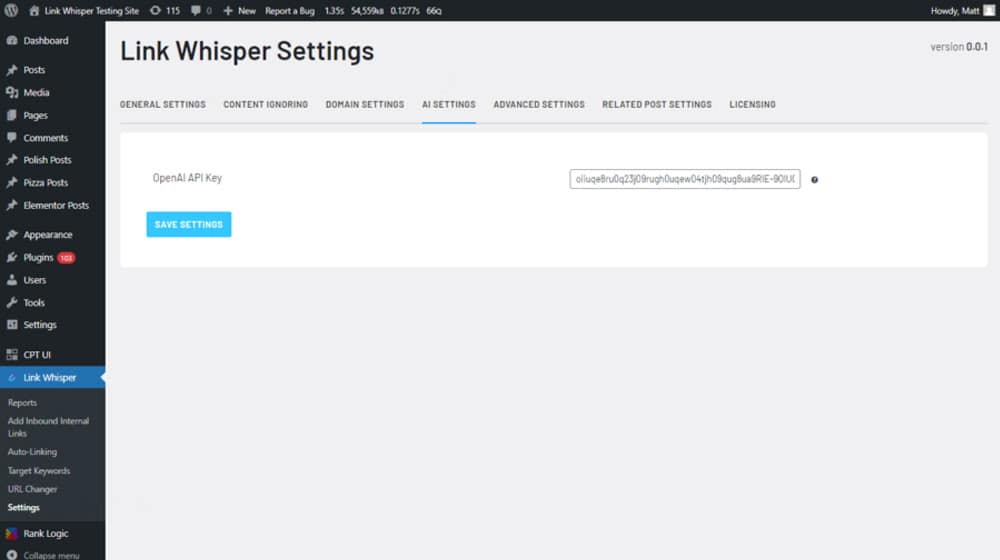
Once your payment has been processed, go back to the dashboard, then click on the API Keys section on the left-hand sidebar. Verify your phone number if you haven't done so before, then click to create a new API key. Make sure permissions are set to "all" so Link Whisperer will be able to use the key. Once you have your API key, plug it into the Link Whisperer Settings.
Step 2: Configure Link Whisperer
Next up, you need to configure Link Whisperer's settings.
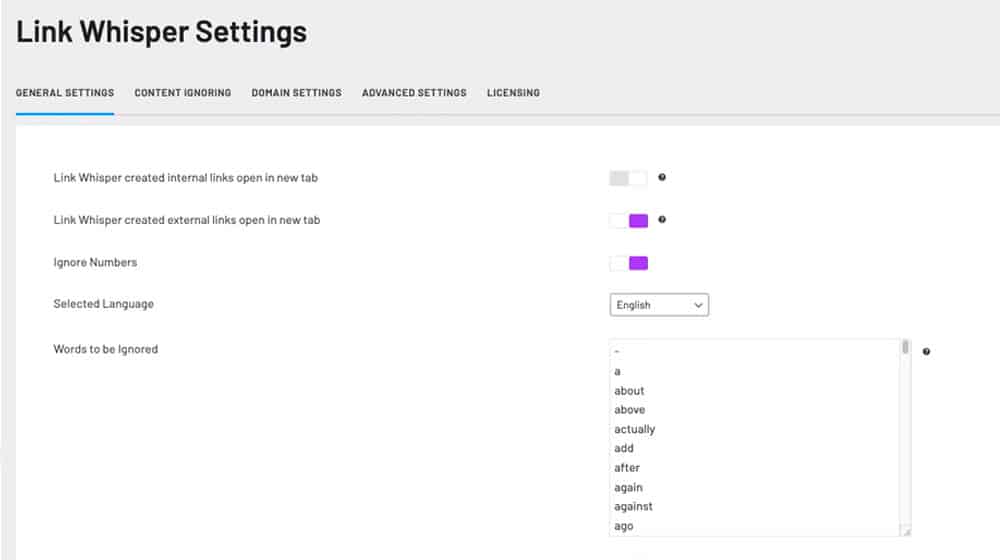
There's a lot here, but the main things you want to do are:
- Choose which AI features to enable. Make sure the Keyword Analysis box is checked; the others are up to you.
- Choose the GPT version you use for your analysis. I found that GPT 4o Mini was fine; if you don't mind needing a higher budget and want a little deeper analysis, GPT 4 would be your option.
- Choose a processing method. You can do continuous processing or batch processing. For very large sites, I recommend batch processing; for sites with under a thousand posts, continuous is probably fine. You can read more about what each of those means on the Link Whisperer Settings page.
- Specify how many keywords you want GPT to identify from each post. The longer and deeper your content is, the more you can support here; I recommend somewhere around 10-20, but you can go as high as 30 for most decent content.
- Set a sitemap "relatedness threshold." This is your minimum threshold for the analysis to decide how closely related posts need to be to recommend a link. I set mine at 85%, and it worked great. I wouldn't recommend anything under 65-70%.
Remember that if you don't like the initial results, you can tweak and re-run the analysis with a higher or lower threshold to get more useful output.
Step 3: Process Data
Click the Begin Processing Data button, and walk away.
This will take a while. The longer your individual posts are, and the more of them you have, the longer it will take. Active processing is faster than batch processing. Also, the more AI features you're running at once, the more analysis it needs to do and the longer it will take.
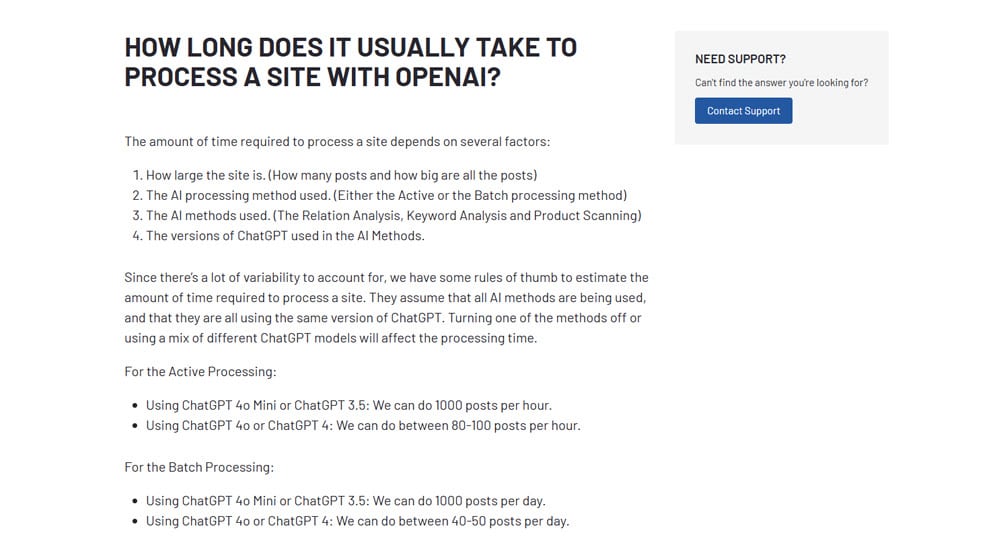
- Active Processing with 4o Mini can do 1,000 posts per hour.
- Active processing with 4 or 4o can do 100 posts per hour.
- Batch processing with 4o Mini can do 1,000 posts per day.
- Batch processing with 4 or 4o can do 50 posts per day.
You need your Link Whisperer page open to let this process, so either run it and minimize it to do other things, set it running and go grocery shopping, take a sales call, or do something that doesn't involve your site directly, and it will be done later. For my site, it took around half an hour to process everything, but my site is also relatively small.
Step 4: Review and Implement Suggestions
Once the processing is done, you can run through the link suggestions Link Whisperer gives you. It's as easy as a click of a button to inject a link, so add any you feel are relevant and reject ones you don't. If the suggestions are way off, you may need to adjust your settings. Fortunately, you shouldn't have to re-run the whole analysis to do so.
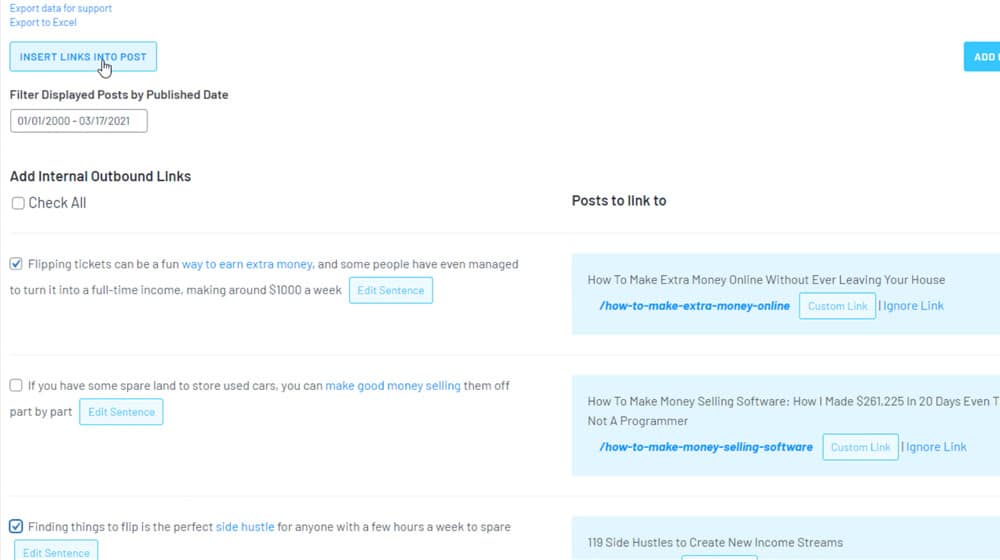
Links added with this process are just normal links, too, which is really nice. It means you don't have to worry about some arcane process to edit or remove them, and if you ever uninstall Link Whisperer, the links stick around.
Once you've gone through your link suggestions, you're done! Ideally, you'll even see a boost to user retention, lower bounce rates, and possibly even a jump in search ranking or traffic when it's all indexed by Google.
Good luck! If you have any questions, let me know.




Comments